VB Magic

2017/08/14

Getting into the 3D Printer world

Filed under: 3D Printing — Tags: — vbmagic @ 4:53 pm

It’s been a VERY long time since I posted anything. Mainly due to work taking up way too much of my time. I have two things that I’m planning on playing with so thought I’d start writing about them (Second will be a separate blog post).

3D Printing

I’ve ordered cheap 3D printer so that I can get into 3D printing again. We used to have one in the office which basically spoiled us and was a very automated and did everything for you (Cost £1000). That has since gone away so I’ve decided to get my own one. I am aiming for a budget printer in this case.

I narrowed my choice down to 4 printers (all prices were from Amazon UK at time of writing). The pros and cons are just some of the ones I was using to decide which printer to get.

1 CoLiDo 3D Printer D1315

Price: £229.00

CoLiDo-D1315

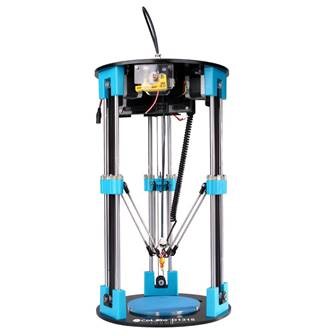
Link: https://www.amazon.co.uk/gp/product/B06WVSL6W1

Pros

  • Looks cool 😉
  • Cheap Price.
  • Quiet.
  • Comes pre-assembled.
  • Uses non propitiatory filaments.

Cons

  • Limited print area.
  • Can only do PLA due to no having heated bed.
  • Not a lot of information online about this one. (Based on my searching and youtube)

2 – Flashforge® 3D Printer Finder Single Extruder Printer

Price: £399

FlashforgeFinder

Link: https://www.amazon.co.uk/gp/product/B00ZBS86ZW

Pros

  • Fully Assembled.
  • Very easy to calibrate.
  • Touch Screen makes it easy to configure.
  • Lots of support and mostly positive reviews on the internet/youtube.
  • Uses non propitiatory filaments.

Cons

  • PLA Only, no heated bed.
  • Cost makes it much closer to mid range than low cost.

3 – Wanhao i3Plus Duplicator Plus

Price: £349.95

Wanhaoi3PlusDuplicator

Pros

  • Easy to set up and configure with touch screen.
  • Well made.
  • Has a heated bed and can use different plastics.
  • Uses non propitiatory filaments.

Cons

  • Has been know to have overheating issues causing plastic to warp while printing (Fixed by a new fan and housing. Housing can be printed by this printer)
  • Has had a safety recall in the past.
  • Cost is approaching that of the mid-range machines.
  • Requires some assembly.

4 – Monoprice 124166 Select Mini 3D Printer

Price: £211.44

Monoprice124166SelectMini

Link: https://www.amazon.co.uk/gp/product/B06XXPN8GY

Pros

  • Cheap Price.
  • Comes fully assembled.
  • Has heated bed so can print with multiple plastics.
  • Easy to use menu system.
  • Solid construction.
  • Uses non propitiatory filaments.
  • Very popular when researching on Youtube and internet.

Cons

  • Requires manual calibration. (With a piece of paper and hex key and by moving head around manually with power off)
  • Has had issues with the clip on the feeding mechanism at the top breaking.
  • Placement of the filament reel can cause the filament to get twisted on the reel.

Conclusion

Summing up the cost and the fact that I can print with multiple plastics coupled with the amount of people out there using them, I have chosen the Monoprice Select Mini printer. The Flash Forge came a close second, but at that price, it would probably be worth spending more and getting a printer around the £600 mark.

It has been ordered and will hopefully be arriving by the weekend.

I’ll follow up on how I get on with it.

2014/09/01

Problems with Windows Phone 8.1 Update Developer Preview and Cyan Update (Lumia Phones)

Filed under: Windows Phone 8, wp8 — Tags: , , , , , — vbmagic @ 2:55 pm

Hi,

This is just a quick note for the people who are on the Windows Phone 8.1 Update and are trying to install the Lumia Cyan firmware update.

Even if the Cyan update is available for you phone. It will not install when you are running the developer preview. To get this installed, you need to be ok with wiping your phone (Backups may be a good idea). The steps to get your phone updated are:

  1. Download the Nokia Recovery Tool
  2. Run the tool which will wipe your phone and reset it to an earlier released OS (Mine was to WP 8.0)
  3. Once the phone has updated, You then need to go into settings and select Phone Update.
  4. Once this update is finished Go back to 3 until the updates are completed before carrying on.
  5. Re-download/run the Developer preview app enable the preview on the phone
  6. Check for update again until there are no more updates and to get your phone back up to 8.1 Update.

This process takes a loooooooooong time so be prepared to spend a couple of hours doing this.

2014/03/31

Connecting an Azure Web Role to an existing Virtual Network connected to company WAN

Filed under: Azure — Tags: , , , , , , — vbmagic @ 3:34 pm

I’ve just been trying to deploy an Azure web role so that it would be available on our company WAN. This is easy for a VM as you just need to specify the Virtual Network when you create the VM. But for a Cloud Service it’s not so straight forward. It turned out to be pretty simple though once I had done some research. The first thing that needs to happen is a small change to the ServiceConfiguration.Cloud.csfg file.

...
  </Role>
  <NetworkConfiguration>
    <VirtualNetworkSite name="myVirtualNetwork" />
    <AddressAssignments>
      <InstanceAddress roleName="myWebSite">
        <Subnets>
          <Subnet name="MySubNet" />
        </Subnets>
      </InstanceAddress>
    </AddressAssignments>
  </NetworkConfiguration>
...

The VirtualNetworkSite name is the name of your Virtual Network.
InstanceAddress roleName is the name of the Web Role in your Cloud Service (Usually the name of your website in your solution).
Subnet name can be found on your Virtual Network Address Spaces section on the Configure tab of your virtual network.

Once that is done and you deploy your website (Make sure you deploy in the same datacentre as the virtual network), you should be able to access your site on the internal network.

In my case there was still a problem. This was an internal site but by default, it was accessible via the Cloud Service’s cloudapp.net address. I did the following things to fix this:

First Double click the role in the Cloud Server project of your solution in Visual Studio. Select Endpoints and change the default end point from External to Internal. Then 80 in the private port.

If you deployed now you would no longer be able to access the website via the external cloudapp.net address. But there is a problem, the Cloud Service’s internal firewall will block port 80 making it impossible to connect to via the internal network as well.

To get around the firewall issue, I created a .bat file and added it to the website project and set “Copy to Output Directory” to “Always”. The bat file contained one command:

netsh advfirewall firewall add rule name="HTTP IN" dir=in action=allow service=any enable=yes profile=any localport=80 protocol=tcp

I then modified the ServiceDefinition.csdef file to add an elevated task just after the WebRole element. (It has to be elevated as netsh will require admin privileges)

  <WebRole name="myWebSite" vmsize="Small">
    <Startup>
      <Task commandLine="fwrules.bat" executionContext="elevated" taskType="simple" />
    </Startup>
...

Once this was deployed the site was blocked from the internet but available on the internal network.

2014/02/17

Dissapearing Mouse on Windows 8.1 with multiple monitors

Filed under: Windows 8 — Tags: , , , , , — vbmagic @ 10:23 am

Multi- Monitor Layout

Multi- Monitor Layout


This is just a quick post about an issue that was driving me nuts. I’ve just got a new work laptop and I have two external monitors connected via a docking station. As you do with a new set-up, I was trying to get the displays setup with the best settings so I was playing with the zoom settings for each monitor. The upshot of this was the mouse cursor had disappeared. If I moved the mouse around, it would still highlight any thing it went over and if this caused the point to change to a different image, it would briefly appear as that image and then disappear again. After much searching I came across a post on Tom’s Hardware site where someone was experiencing a similar issue and the advice that simonjonestlp gave, fixed the problem for me.

I am just repeating it here for anyone else with the issue:

With machine on, Unplug both screens from the back of the PC (Or docking station in my case)
Plug them back in.

That is it. After this I could see the cursor again.

2013/12/31

2013 in review

Filed under: Uncategorized — vbmagic @ 11:13 am

The WordPress.com stats helper monkeys prepared a 2013 annual report for this blog.

Here’s an excerpt:

The concert hall at the Sydney Opera House holds 2,700 people. This blog was viewed about 19,000 times in 2013. If it were a concert at Sydney Opera House, it would take about 7 sold-out performances for that many people to see it.

Click here to see the complete report.

2013/11/04

Jenkins & Maven = Arrrgh

Filed under: Uncategorized — Tags: , , , — vbmagic @ 5:48 pm

Just a quick post for other people who find that they are having problems trying to build a Maven Job in Jenkins. I’ve just spent the best part of an afternoon trying to track down why I kept getting a Non-resolvable parent POM error message while trying to build a Maven Job in Jenkins. It worked fine in the command line but refused to build in Jenkins. After lots of hair pulling out and other people um’in and ar’ing I eventually found a solution. If you keep getting this error, try creating a new Freestyle Job and add the maven build as a build step. It worked great for my project. I hope this post saves anyone else a wasted afternoon trying to track this down.

2013/10/23

Accessing Jenkins API from VB.net

Filed under: .NET, ASP.NET MVC, VB.NET — Tags: , , , , , , — vbmagic @ 3:17 pm

As this was one of those things it took a while to track down I though a quick post would help others trying the same.

I have an up-to-date Jenkins server running builds and I would like to pull a list of failed jobs from the server and display them on a website.
First you need to look up the correct URL to access the list of jobs so after seeing a few posts in blogs and going to the Jenkins Website I worked out it follows this principle.

http{s}//{your Jenkins URL}/api/{xml/json}

If you leave off the xml/json parameter you will get a help page.

I my case I wanted the result in XML as VB.net has good xml integration. So my URL is:

http://mydomain.com:8080/api/xml

This will return something similar to the following XML code:

<hudson>
  <assignedLabel/>
  <mode>NORMAL</mode>
    <nodeDescription>the master Jenkins node</nodeDescription>
  <nodeName/>
  <numExecutors>2</numExecutors>
  <job>
    <name>ProjectBuild</name>
    <url>http://myhost.com:8080/job/ProjectBuild/</url>
    <color>blue</color>
  </job>
  <job>
    <name>IntegrationTests</name>
    <url>http://myhost.com:8080/job/IntegrationTests/</url>
    <color>red</color>
  </job>
  <overallLoad/>
  <primaryView>
    <name>All</name>
    <url>http://myhost.com:8080/</url>
  </primaryView>
  <quietingDown>false</quietingDown>
  <slaveAgentPort>0</slaveAgentPort>
  <unlabeledLoad/>
  <useCrumbs>false</useCrumbs>
  <useSecurity>true</useSecurity>
  <view>
    <name>All</name>
    <url>http://myhost.com:8080/</url>
  </view>
  <view>
    <name>Status</name>
    <url>http://myhost.com:8080/view/Status/</url>
  </view>
</hudson>

We can see that the job information is under the job element so the following code goes into the controller action. This code can be easily modified to work in a non ASP.net MVC environment.

        (...)
        Dim jenkinsURI As New Uri("http://myhost.com:8080/api/xml")
        Dim request As HttpWebRequest
        Dim xmlJobList As XElement
        model.failedJobs = New List(Of JenkinsJob)
        Try
            request = WebRequest.Create(jenkinsURI)
            Dim res As HttpWebResponse = request.GetResponse
            Dim reader As New StreamReader(res.GetResponseStream)
            xmlJobList = XElement.Parse(reader.ReadToEnd)
            reader.Close()
            For Each job In xmlJobList...<job>
                Dim c As String = job.<color>.Value
                If c = "red" Then
                    Dim jj As New JenkinsJob
                    jj.Name = job.<name>.Value
                    jj.URL = job.<url>.Value
                    jj.failed = True
                    model.failedJobs.Add(jj)
                End If
            Next
        Catch ex As Exception
            ' ignore for now
        End Try

        Return View(model)

It will loop through all the job nodes and if the color element is set to red then this indicates a filed job so add the name and URL to the view model to pass to the view.

This is the section of the view which will display the failed job. It uses the new bootstrap template that ships with Visual Studio 2013 and will only appear if the are any failed jobs.

    (...)
    @If Model.failedJobs.Count > 0 Then
        @<div class="col-md-3">
            <h2 class="alert-danger"><a href="http://myhost.com:8080/view/Status/" target="_blank" title="http://myhost.com:8080/view/Status/">Failed Jenkins Jobs</a></h2>
            <table cellpadding="2">
                <tr>
                    <th>Job Name</th>
                </tr>
                @For Each job In Model.failedJobs
                    @<tr>
                        <td><a href="@job.URL" title="@job.URL">@job.Name</a></td>
                    </tr>
                Next
            </table>
        </div>
    End If
    (...)

2013/08/09

2013/06/24

VB.Net Getting a MD5 from a remote file asynchronously

Filed under: .NET, VB.NET — Tags: , , — vbmagic @ 3:10 pm

Took me a few hours to work this one out so I thought I’d post a small code snippet to show how it is done.

To do this you need the following Imports

Imports System.Net
Imports System.IO
Imports System.Security.Cryptography

It cheats in the fact that it downloads the file first and then does a checksum on it. But this is going to be used as a trigger for something else.

    Private _wc As New WebClient
    Private _baseUri As String = "http://mysite.com/myfiles/"

    Private Async Function GetDetails(filename As String) As Task(Of String)
        Await _wc.DownloadFileTaskAsync(New Uri(_baseUri & filename), "c:\downloads\" & filename)
        Dim result As String
        Using stream = New BufferedStream(File.OpenRead("c:\downloads\" & filename), 1200000)
            Dim hash As New MD5CryptoServiceProvider
            Dim checksum As Byte() = hash.ComputeHash(stream)
            result = BitConverter.ToString(checksum).Replace("-", String.Empty)
        End Using
        Return result
    End Function

    Private Async Sub Button1_Click(sender As Object, e As EventArgs) Handles Button1.Click
        Dim md5 As String
        md5 = Await GetDetails("myfile.exe")
        ResultLabel.Text = md5
    End Sub

2013/03/25

Windows Phone 8 Speech API is easier than I thought

I decided to try out the Windows Phone 8 Speech API and expecting it to be quite complicated I had a pleasant surprise…

I created a new project and found that all the speech functionality is already in the SDK.

Below is a simple XAML screen to test out the functionality

        <!--TitlePanel contains the name of the application and page title-->
        <StackPanel Grid.Row="0" Margin="12,17,0,28">
            <TextBlock Text="VBMAGIC" Style="{StaticResource PhoneTextNormalStyle}"/>
            <TextBlock Text="speech toy" Margin="9,-7,0,0" Style="{StaticResource PhoneTextTitle1Style}"/>
        </StackPanel>

        <!--ContentPanel - place additional content here-->
        <Grid x:Name="ContentPanel" Grid.Row="1" Margin="12,0,12,0">
            <StackPanel>
                <TextBlock HorizontalAlignment="Center">Enter Text To Say</TextBlock>
                <TextBox x:Name="speechTextBox"></TextBox>
                <Button x:Name="sayitButton">Say It</Button>
                <Button x:Name="listenButton">Listen</Button>
            </StackPanel>
        </Grid>

And this is all the code I needed to actually handle everything.

Imports System
Imports System.Threading
Imports System.Windows.Controls
Imports Microsoft.Phone.Controls
Imports Microsoft.Phone.Shell
Imports Windows.Phone.Speech.Synthesis
Imports Windows.Phone.Speech.Recognition

Partial Public Class MainPage
    Inherits PhoneApplicationPage

    Private _synth As New SpeechSynthesizer
    Private _recog As New SpeechRecognizerUI()

    ' Constructor
    Public Sub New()
        InitializeComponent()

        SupportedOrientations = SupportedPageOrientation.Portrait Or SupportedPageOrientation.Landscape

    End Sub

    Private Sub sayitButton_Click(sender As Object, e As RoutedEventArgs) Handles sayitButton.Click

        ' Says it all
        SayIt()

    End Sub

    Private Async Sub listenButton_Click(sender As Object, e As RoutedEventArgs) Handles listenButton.Click

        _recog.Settings.ReadoutEnabled = False
        _recog.Settings.ShowConfirmation = False

        ' Display the speech recognition dialogue
        Dim recoResult = Await _recog.RecognizeWithUIAsync()

        ' Put the text that comes back into the speechTextBlock
        ' and then say it.
        speechTextBox.Text = recoResult.RecognitionResult.Text
        SayIt()
    End Sub

    Private Async Sub SayIt()

        ' Speak the contents of the speechTextBox
        Await _synth.SpeakTextAsync(speechTextBox.Text)

    End Sub
End Class

I switched off some of the default Speech Recognition UI features which were a bit of an overkill for this simple app (Look under _recog.Settings for all settings)

To enable this functionality to work you need to modify the app manifest. On VB.net projects. Click the Show All Files icon in the Solution Explorer, Open the My Project Directory, Double click the WMAppManifest.xml file, Click the capabilities Tab and make sure that the following options are ticked.

  • ID_CAP_MICROPHONE
  • ID_CAP_NETWORKING
  • ID_CAP_SPEECH_RECOGNITION

That is it. Nothing else required.

Older Posts »

Blog at WordPress.com.